I’m making all these luminaries for our centerpieces. Centerpieces that I haven’t really seen beyond the visions I hold in my head. I guess I’m just crossing my fingers and hoping these centerpieces stick and I’m not wasting time and energy on this project.
The luminaries themselves are super easy and to do only 2 or 3 of them takes a just a few minutes, however, I need about 75-100, perhaps more. So each time I’m watching TV I pull out my little luminary making supplies and bust out a few paper luminaries. It slowly adds up and it’s easier on my hands, which I noticed start to ache if I do more than 10 at a time.
What’s that you say? You want a tutorial…so far ahead of you sister friend (or brother man, can’t forget the brothers).
Supplies needed:
· 8.5 x 11 paper (Standard Size Letter) in whichever color your heart desires
· Scissors
· Paper Cutter of some sort
· Standard Hole Punch
· Glue or Double-sided Tape
· 16 mm Circular Hole Punch (Or any shape around that size would probably work)
· Pen/Pencil/Some sort of marking implement

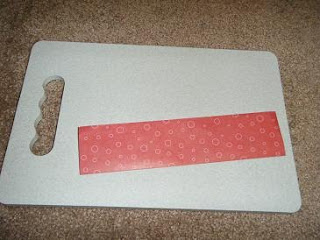
Doing this on a flat surface is helpful; I just used a cutting board while sitting on the floor.
Step 1: Cut paper into 4 inch by 8.5-inch strips, each piece of paper should make 2 luminaries.


Step 2: Fold the strip in half the long way. (Or make a hot dog bun, if you’re familiar with that term)
Step 3: Open up the paper, then with your tape measure, make marks every two inches, (1 mark at 2, 4, 6, and 8-inches)


Step 4: Fold the paper at each mark

Step 5: Cut at each of the section folds just to the half fold. Cut away the bottom portion of the small half inch fold.

Step 6: Glue or tap the small half-inch piece to the inside of the first square, so it makes a box-like shape. Then fold all the bottom pieces under and glue or tape the last piece so that you have a box without a top.

Step 8: With the small hole punch, punch two holes opposite of each other, do the same with your larger hole punch.

Voila! Add a tea light (mine is battery operated) use ribbon or craft wire through the small holes to hang your finished product wherever you please!


No comments:
Post a Comment