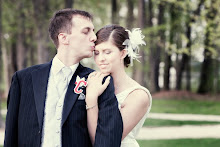
Recaping the wedding is really hard for me, tho I'm not really sure why. Perhaps because there are hundreds of pictures to go through, or because there are moments that I want to describe but don't have pictures to accompany them, or because I got burned out on wedding stuff and just needed the distance and now I'm so far out after the wedding that it seems silly. Whatever the reason, I am having trouble finding witty ways to share my wedding recaps with you.
In non-related news, Mr. Tal and I have officially relocated to Columbus and we are now living in a house, we have a new puppy, and I have been at my new job for over a month (umm, what?). You can read all about it over at Tales from the SalTals. I promise to get organized and start talking about the wedding soon.
Tune in again soon.
Showing posts with label DIY. Show all posts
Showing posts with label DIY. Show all posts
Tuesday, August 10, 2010

Tuesday, July 6, 2010
Postings on Pause
I didn't want anyone to think that I was not going to finish my recaps. I am I promise. I just have a lot to do. See, Mr. Tal and I both got new jobs, in a new city, which means we are in the process of relocating. If that wasn't enough of a reason to be light on posting, I start my job next week. Yeah, so I am freaking out just a little bit, we are trying to find a place to live, make sure I have a temporary place to stay, pack up our apartment and do as much as humanly possible before next week. It's crazy and exciting and you'll be able to read all about it over at Tales from the SalTals. It should be fairly interesting and entertaining to say the least. So bear with me through the next couple weeks, I'll try to post the rest of the rehearsal and start on the actual wedding day by next week, but if I don't, you can see I have good reasons.
Stay tuned for more tales from a DIY bride.
Stay tuned for more tales from a DIY bride.
Thursday, June 10, 2010
The Day Before
The day before the wedding was kind of crazy. In hindsight, we probably could have been better organized, gave ourselves more times, and asked for a little more help. However, I was so specific about every detail, that I probably wouldn't have accepted any more help than we had. Mr. Tal and I spent the morning finishing a few last minute details and loading them into the truck and heading over to the reception site. There we spent about 4 hours on set up. We weren't smart enough to take pictures of the hall before and after set up but I have some beautiful detail shots.


(All Photos by J Wagler Photography)
All this was a joint effort between Mr. Tal, myself, Momma and Daddy Sal and Momma Tal. To start, we had to set up all the tables, literally. We had to take all the chairs off the tables and any that we weren't using we had to stack in the back. We had to move them into the place and put on the table clothes and set up the chairs. Once all the tables were into place we had to actually set them up to look all pretty. We decided to set up the smaller tables first, like the guest book table, the place "card"(aka the wooden disks) table, and the cake and gift tables. Once those smaller tables were set up, we moved on to the guest tables (without the runners because they hadn't arrived yet, haha, long story), first up centerpieces.
We had no choice but to assemble our centerpieces at the site because the manzanita branches in the pots would have been too high to transport and more than likely the pots would have fell over en route. So in our own little assembly line, Mr. Tal and Momma Sal filled the pots with litter (yes, we used cat litter, it was the most economical choice), then the branches were stuck into some floral foam and more litter added on top, after that the spanish moss and little birds were added by myself and Momma Tal, then the finished product was taken to the tables by Daddy Sal. After all those were in place we had to go around and add the strings of beads (cut up garland with wire added), and paper lanterns with battery-operated tea lights. Voila! Centerpieces were up and looking fabulous, in my humble opinion. After centerpieces came the wooden silverware wraps at every place, along with the bagged cookie favors and our table letters. Once we were done our hall looked transformed, and that was without chair covers, which were being delievered later that afternoon.
We all went our seperate ways early that afternoon to get ready for our rehearsal.
Next up, our rehearsal or why my day-of coordinator is worth her weight in gold.
Tune in next time for more tales from a DIY bride.
Wednesday, June 9, 2010
Guilty.
You know I read Weddingbee religiously and I fall in love with these bloggers and their weddings and then they get married and it's like poof, they disappear. I get so upset because want all the yummy details, I want to see how the entire wedding ended up turning out and I was always thought to myself, is it really that hard to do a recap? Now I'm looking a little sheepish because as you may have noticed, I'm totally guilty of the disappearing act as well. It's weird because prior to the wedding I could usually manage a post at least every other day, yet post-wedding I feel like I struggle to get one out every two weeks. It's been crazy, job hunting, speeding tickets, graduations, hospitilizations, just trying to enjoy married life and stuggling to figure out our future (we'll discuss that more over at Tales from the SalTals our newlywed blog which is in constuction right now). But I have some time now and I have my beautiful pictures from Jackie so I can share my wedding in detail with you.
Where did I last leave off? Oh, that's right it was coming up on Wedding Week. The Monday and Tuesday of wedding week (April 12th and 13th) were final project days. Printing programs, wrapping favors, and getting everything packed up and ready to haul over to our ceremony and reception sites. It was pure craziness.
Monday, Mr. Tal was working furiously to make our wedding canopy work while I was fighting with my compter and printer to make the ceremony programs come out just right. Let me tell you our apartment is not big, so Mr. Tal putting up a 5x7 canopy in our living room while I am printing and assembling programs in the same room would have been a little comical, but adding the freaked out dog and two cats it was downright hysterical. Let's just say the canopy fell a time or two and not just because of inadequet structural support and my programs (and the ribbons that tied them together) got attacked by some kitty paws. I would have found it funny if I wasn't so stressed out.
Tuesday, I spent most of the day assembling programs, packing and cleaning since we were going to have some guest come over that night. Mr. Tal spent the day at work pretending to work while really figuring out how to make the canopy work. That night he ended up buying bigger bases, paint and gravel to finish up that project. Meanwhile, Iasked demanded my friends Miss A and Mrs C to help put together our cookie bag favors while we watched American Idol. In return they got to eat any leftover cookies, so I think it was a win win.
Wednesday was my pamper day. Momma Sal had given me a card for my shower with Mr. Tal's family that requested that we get manicures and facials two days before the wedding. The facials didn't work out because I know that breakouts often happen in the week or so after the facials so we ended up getting mani/pedis and going out to a nice lunch together. It was heaven after all the stress of the last few weeks. It was really nice to spend some alone time with my mom before the big day. That night Mr. Tal and I packed up all of our wedding supplies (oh, how much bigger the apartment seemed) in his truck in preparation for the next day which was set-up and rehearsal.
I promise there won't be too big of a gap in between this post and the next.
Please tune in next time for more tales from a DIY bride.
Where did I last leave off? Oh, that's right it was coming up on Wedding Week. The Monday and Tuesday of wedding week (April 12th and 13th) were final project days. Printing programs, wrapping favors, and getting everything packed up and ready to haul over to our ceremony and reception sites. It was pure craziness.
Monday, Mr. Tal was working furiously to make our wedding canopy work while I was fighting with my compter and printer to make the ceremony programs come out just right. Let me tell you our apartment is not big, so Mr. Tal putting up a 5x7 canopy in our living room while I am printing and assembling programs in the same room would have been a little comical, but adding the freaked out dog and two cats it was downright hysterical. Let's just say the canopy fell a time or two and not just because of inadequet structural support and my programs (and the ribbons that tied them together) got attacked by some kitty paws. I would have found it funny if I wasn't so stressed out.
Tuesday, I spent most of the day assembling programs, packing and cleaning since we were going to have some guest come over that night. Mr. Tal spent the day at work pretending to work while really figuring out how to make the canopy work. That night he ended up buying bigger bases, paint and gravel to finish up that project. Meanwhile, I
Wednesday was my pamper day. Momma Sal had given me a card for my shower with Mr. Tal's family that requested that we get manicures and facials two days before the wedding. The facials didn't work out because I know that breakouts often happen in the week or so after the facials so we ended up getting mani/pedis and going out to a nice lunch together. It was heaven after all the stress of the last few weeks. It was really nice to spend some alone time with my mom before the big day. That night Mr. Tal and I packed up all of our wedding supplies (oh, how much bigger the apartment seemed) in his truck in preparation for the next day which was set-up and rehearsal.
I promise there won't be too big of a gap in between this post and the next.
Please tune in next time for more tales from a DIY bride.
Thursday, May 20, 2010
Good News!!!
I know I have been remiss in my blogging but I really don't have a lot to say. I have the week of the wedding, the actual wedding and the honeymoon to cover but I honestly don't expect much more than 10 posts to come out of that, which means my bridal blogging days are numbered. I'm sure that I will go back and explain some of the DIY projects that were major successes (centerpieces, place cards, etc) and I'll occasionally pop over here to list some cool bridal news. Other than that, Mr. Tal and I are working on starting up a newlywed/family blog so that I don't have to leave you completely. Besides dreading the end of my bridal blogging, I also didn't have any pictures from the wedding week or the wedding to go along with my tales. However, I recieved word today that our proofing gallery is almost ready! That means soon my recaps can begin. So look for my posts to come soon!
Tune in next time for more tales from a DIY bride.
Tune in next time for more tales from a DIY bride.
Wednesday, April 7, 2010
NOOOOOOOOO!!!
Our 10 day forcast is officially allowing us a peek at the weather on our wedding day. It's going to be 70 with at 50% chance for rain. I like the 70 part warm but not too warm and I know that superperstition says that rain on the wedding day is good luck, but I don't want it. Sad face. I know there is time for it to change and that is m one bright shiny hope. We will have to wait and see.
On a sidenote, I am incredibly proud of the work we are getting done every day. It's frustrating that we have all this work to do and we aren't really having time to relax so close to the wedding. However, my goal is to have most of our work done by next Wednesday so that we will have the two days before the wedding to really just savor it. Wow, in 9 days I will be married. Craziness.
Tune in next time for more tales from a DIY bride.
On a sidenote, I am incredibly proud of the work we are getting done every day. It's frustrating that we have all this work to do and we aren't really having time to relax so close to the wedding. However, my goal is to have most of our work done by next Wednesday so that we will have the two days before the wedding to really just savor it. Wow, in 9 days I will be married. Craziness.
Tune in next time for more tales from a DIY bride.
Thursday, March 4, 2010
The Miscellaneous
Besides the utensil wraps that we completed this past weekend, we got a few miscellaneous projects started and a few completed. The pew cones from way back when, those are done with the exception of needing some crumpled up paper to steady the flowers in them. Some of the centerpieces got painted and glued together. Some of the garland strands were strung on wire. Mr. Tal cut out the wood that the table name cards will be held in and the holes were hammered into those to hold the wire. Like I said, lots of miscellaneous things. Take a look:

Momma Sal making the pew cones!

Sister A painting pots, I assisted with this along with gluing the pots on top of each other to create our tall centerpieces.

Sister E attaching wire to the massive amounts of cut up strands of garland for the centerpieces.

Sister A hammering holes into the wood pieces that Mr. Tal cut. See the massive amount of wood pucks in that plastic bag?

The completed name card holders with wire and all!
We still have some work to do, the name card holders need wire, we need to assemble all the centerpieces, we need to stuff the pew cones, but we got a lot knocked off the list. It seems so crazy that our wedding is only six weeks away from tomorrow, I keep thinking there is so much to do but in reality we have gotten a lot done and my DIY to do list is becoming shorter and shorter.
Tune in next time for more tales from a DIY bride.
Wednesday, March 3, 2010
Stiches
It felt a little weird not to blog yesterday but I think I needed a little break to recover from a little cold. Now on to your regularly scheduled posting.
As I said on Monday, this past weekend was really productive, especially on Sunday. There was a bunch of miscellaneous crafting done but one really big project was completed. The silverware wraps! I took the fabric I had starched a few days prior to prevent fraying and Momma Sal and sisters A and E created an assembly line.


As I said on Monday, this past weekend was really productive, especially on Sunday. There was a bunch of miscellaneous crafting done but one really big project was completed. The silverware wraps! I took the fabric I had starched a few days prior to prevent fraying and Momma Sal and sisters A and E created an assembly line.

There's Momma Sal cutting out the fabric strips. Meanwhile in the kitchen, sister E is laying the utensils and napkins in neat, easy to grab piles (which I don't have a picture of, but if you look in the first picture below you can see the neat piles and E herself). After the strips are cut, I take them into the kitchen for sisters A and E.


(E and her piles above, helping out A, below, with the second and third steps)
We did this next step the lazy woman's way, instead of sewing on the buttons we glued them on. Go, go super lazy powers! Then we closed the wrap and glued it shut. I know, not the best way to do things but it ended up looking fine and we knocked these babies out in 2 hours flat. Check out the massive piles!

I may be biased but I think these little suckers turned out rather well, especially for deciding to do them last week!
But FMT, what does the title of your post have to do with anything? You didn't stich anything, you were lazy? Well that's a funny side story, fifteen minutes into the assembly line, I hear my mom call out for me and ask if Momma Tal has any band aids in her house. Umm I don't know. I called downstairs for Mr. Tal who promptly ran upstairs and asked what for? Remember the little roller fabric cutter my mom was cranking out fabric strips with? Yeah, she sliced her finger with it.(Honestly, Mr. Tal wonders why I am so klutzy sometimes, well I inherited it.) Here's the thing, we Sal's don't do things half-assed, she cut her finger and she cut it good. It didn't even hurt. Without being too graphic she needed another band aid within an hour. The next day she told me that she had to splint her finger at work because everytime she moved it it broke open. Yeah, she probably needed stiches, and now you understand the title of my post.
Have you ever had a project that injured yourself or others?
Tune in next time for more tales from a DIY bride.
Friday, February 26, 2010
What to do?
This weekend is literally our last weekend of "freedom" until Easter. By freedom, I mean that Mr. Tal and I both have some sort of commitment every weekend from now until Easter, and I think that includes Easter. Oy. Don't get me wrong, it is all fun stuff, here's the list: next weekend is our (seperate) bachelor and bachelorette parties, the weekend after that is another bachelorette for those that can't make it to the first and a shower, the weekend after that is an engagement shoot with our new photographer, and the weekend after that is another shower. We are both really excited about all of these activities. It's just when you have that much scheduled it makes you feel a little overwhelmed. Especially when there are a lot of projects and things to get done for the wedding. So what are a bride and groom to do? I guess I can only answer that question for us.
We decided to take this weekend and make it both work and fun. Today and tomorrow we are going to do something fun, we haven't decided what. Kalahari was thrown out there, which is an indoor water park that's about an hour away but I don't think it is decided, we both just want some alone together time before the weekend marathons begin. Then Sunday, my Mom and sister 'maids are going to go to Momma Tal's house to work our tails off on some wedding projects. I really hope we get a lot checked off the list and we get some project pictures so I have some DIY posts next week.
Anyone else have a boatload of weekend activities before the wedding?
Have a good weekend everyone, I'll be back on Monday to hopefully share some finished projects.
Tune in next time for more tales from a DIY bride.
We decided to take this weekend and make it both work and fun. Today and tomorrow we are going to do something fun, we haven't decided what. Kalahari was thrown out there, which is an indoor water park that's about an hour away but I don't think it is decided, we both just want some alone together time before the weekend marathons begin. Then Sunday, my Mom and sister 'maids are going to go to Momma Tal's house to work our tails off on some wedding projects. I really hope we get a lot checked off the list and we get some project pictures so I have some DIY posts next week.
Anyone else have a boatload of weekend activities before the wedding?
Have a good weekend everyone, I'll be back on Monday to hopefully share some finished projects.
Tune in next time for more tales from a DIY bride.
Wednesday, February 24, 2010
Thievery
Most of my ideas for the wedding have been inspired from others. I see things that other people create and I find ways to modify it to fit the vibe of our wedding. I honestly think that is the way most brides are, they search the web, read books and magazines in search of inspiration, take ideas and make them their own. It works for the most part, because every wedding is different.

There have been very few ideas that I have seen and thought, "I must do that exact project!" Except this one:

(Source)
SO CUTE! I have been in desperate need to jazz up the tables at the reception and I saw this and just thought it was too perfect. This was one of the Bee Blogger's on Weddingbee (Miss Poodle to be exact) project. Well they say imitation is the sincerest form of flattery, I hope she agrees. I showed Mr. Tal and he loved the idea so we ordered the utensils and bought some fabric and we are hoping to put these little beauties together this weekend.
Are there any ideas you have seen and just had to do the exact same thing?
Tune in next time for more tales from a DIY bride.
Wednesday, February 10, 2010
Ding!

(Source)
Insert that over my head and you see what happens sometimes when I am in Hobby Lobby. I will be walking around browsing and I will see something and it just clicks. It's only happened about twice but when it does it is amazing. I remember the first time it did I was walking through the wedding section and looking at the little floral nicknacks and it was like boom. I think it scared Mr. Tal when it happened. I just started grabbing things and running around the store looking for all the things I needed for the guys' boutonnieres. The second time it happened was when I was looking for my own bouquet supplies. It just clicked and I bought all that I could for the project. Unfortunately, they didn't have all the flowers I needed at either Hobby Lobby and they didn't get any in the next two shipments. Luckily enough we went down to Columbus this past weekend to see Bestie and Mr. Tal's Brothers and Sis-in-Law which presented a perfect opportunity to check out the flowers at the local Hobby Lobby. They had the last of the supplies I needed for my bouquet, but I had to wait until I got home to put everything together.
Like I said, Monday was a crafting extravaganza for me and I cranked out my vision for my bouquet in no time flat. I actually did a mock up of the bouquet before I trimmed anything up to make sure it is what I wanted. After the mock up and a few "are you sure's?" and pictures, I took the bouquet apart and trimmed all the little extras off the silk flowers and took a few inches off the stalks. I re-assembled the bouquet piece by piece, using floral tape to secure each flower and make sure it didn't shift in the assembly process. I didn't actually take pictures of the assembly process because I got really engrossed in the process. However, I do have the end results and I think it is exactly what I was imagining when I first had the vision in Hobby Lobby.


I'm not entirely sold on the feathers, but only because they don't seem to cooperate. I like the idea of the feathers because I have feathers in my hair piece and the girls will have a small feather in their updos. If I can play with the feathers a bit and see if I can get 'em to fan out a bit. I also need to re-wrap the base with the ribbon and I'm not sold on the silver color, but you get the general idea.
Reader thoughts, comments, concerns?
Anyone else had a project vision that came to life like you imagined? Please share.
Tune in next time for more tales from a DIY bride.
Tuesday, February 9, 2010
A Home for the Hallmarks
Well, my blog still looks funny but I can't hold back any longer. I've been busy, busy, busy like a really big bee. The knot countdown has been making me a little nervous we are currently 66 days out and that just feels really close. I just can't procrastinate any longer. So yesterday I got my happy feet into Hobby Lobby and Michaels (a.k.a. my second homes) and got the last of the supplies to finish the card box, my bouquet, and one of the bridesmaids gifts. I cranked out the first two projects no problem, the third is taking a little longer because I have four to make. Anywho, without further ado, here is our card box:

 This project was so easy that it was a little ridiculous. I got the metal greenhouse type thing (obviously that is the technical name, from here on out it will be known as the box) at Hobby Lobby a few weeks back. I knew it was perfect, especially when the original concept for the card box fell through. Originally I had two hat boxes that I bought in two sizes, the smaller one would be put on top of the larger one and the bottom of the small one and the top of the larger one would be cut out and they would be attached somehow. Well, I did it and it looked bad so it was back to the drawing board.
 For this project, I bought the wooden letters and paint at Michaels and I had some floral wire already. All I did was paint the letters (dolphin grey) waited for them to dry. I took the dried letters and spaced them evenly across the front of the box, heated up the glue gun and glued the wire to the letters. I then slipped the wire ends through the sides of the box. The windows of the box are just a flexible plastic which are easy to push in if space is needed to put stuff (like wire) around the metal supports. Now I just need to figure out if we should prop the top open so people can just drop it in cards or if people can figure it out for themselves or if we should cut out the top roof panel. Thoughts anyone?
 I really love how this card box looks, it's so rustic feeling and it looks great. I am actually happy that the original card box idea failed because this one is so much better.

Anyone else have a project failure turn into something better?
Tune in next time for more tales from a DIY bride.
P.S. Lauren- I turned on the comments, I think!
Wednesday, February 3, 2010
Alternative to bridesmaid bouquet
When I decided to do something else other than a bouquet for the bridesmaids to carry, I had a lot of trouble finding things on the interweb, most ideas included fans and parisols and that doesn't exactly work with a spring wedding in Ohio, so I came up with my own alternative. I decided the girls would carry clutches but the clutches would have a silk flower corsage on the front of it so that it would have a bouquet look and feel but not be a bouquet. So here is what I came up with (I appologize for the crappy cell phone pictures, I don't have a camera right now):


Ridiculously simple but it looks nice. So here is what I did, but anyone could could create something very different, it's just a matter of what look you are trying to achieve. Here are the supplies I used:

Flower of my choosing taken off the stem, ostrich feather, floral tape, glue gun. Not picture is the bar pin that I glued onto the back of the flower once it was complete and the scissors. From here it was so easy. All I did was pinch a bit of the ostrich feather together and cut it off the main feather. Then I used hot glue and floral tape to secure the feather grouping together. From there I glued the grouping onto the back of the flower. I repeated this until I thought that the flower looked good. It was seriously that easy. Once I was done I glued the back of the flower to a bar pin, which in turn will be used to secure the flower to the clutch. Obviously there are so many options for this. You could use smaller flowers in a groups, add pearls, rhinestones, whatever. It's whatever you want and a great alternative to bouquets. Here's the clutch I used and the clutch with the flower attached:


This is the simple look I was going for, I could have just left the flower alone but I think the feathers add just a little bit of sass. The girls will then carry these either clutched in their hand or by the strap that comes with the clutch, I'm not sure, I have to see someone else carry them and Mr. Tal isn't a willing volunteer. I think it will look nice and it is handy. I can make sure someone has some tissues for me! Best of all after the ceremony the girls can remove the flower and have a clutch to hold any necessities for the night.
Does anyone else have alternatives to bouquets? Please share, I'm sure I'm not alone in wanting something different.
Tune in next time for more tales from a DIY bride.
Tuesday, January 26, 2010
Dragging my feet
As I sit here sipping my coffee and planning out my day, I'm thinking about all the things I have to do and how much I just don't want to do any of it. Okay, so working out won't be too bad once I actually get to the gym, cleaning will make me happy once it is done, and running some applications that could potentially get me a job is worth it in the end. But those are the end results, and right now I'm quite cozy on the couch, it's the getting going I have problems with. I'm a procratinator. There I said it. If it's not fun, I will put it off as long as possible. Final papers get done the last week of classes. Studying is done two hours before class starts. Housework is the odd anomaly because I will willingly dive in when I'm stressed out as it makes me feel better, but if I am not stressed I will wait until an hour before Mr. Tal gets home to get it done.
Wedding planning and crafting is no different for me. Dress shopping, I dove right in. I have been playing with my wedding makeup since we got engaged. The not so fun stuff, like getting my passport waited until Mr. Tal was ready to kick my butt (I finally got it last week). As far as crafting goes, if I like it I will work on it as soon as possible. Centerpiece mockups and the guys' boutonnieres were played with months ago because all that stuff is fun for me. I have a big pile of wedding crafts that need done that are so boring that I can't bring myself to do any of them. I have strands of garland that need wire hooks attached to them. I need to cut ribbon and string it through the lanterns. I have pew cones that need hot glued and strings added. I have silk flowers for the pew cones that need about a foot of stem cut off. See, really un-fun stuff. All this stuff is so important to the wedding day decor and it will be worth it when it is done it is just doing it that is the problem.
The worst part of my procrastination is that I feel guilty when I don't do it. Some procrastinators are lucky in that they don't ever feel guilty for not doing the things that they should. Not me, my procrastination comes with a big, heaping pile of guilt. The fact that I am writing this rather than cleaning makes me feel guilty. The fact that yesterday I took a day to myself rather than do wedding crafts makes me feel guilty. It's awful, but in a good way, because eventually the guilt will overwhelm me and I will do the things that need doing. Hopefully, soon enough guilt will pile on my conscience and I will get my boring craftys done.
Anyone else have the procrastination gene? Do you have the double-whammy of procrastination guilt?
Tune in next time for more tales from a DIY bride.
Wedding planning and crafting is no different for me. Dress shopping, I dove right in. I have been playing with my wedding makeup since we got engaged. The not so fun stuff, like getting my passport waited until Mr. Tal was ready to kick my butt (I finally got it last week). As far as crafting goes, if I like it I will work on it as soon as possible. Centerpiece mockups and the guys' boutonnieres were played with months ago because all that stuff is fun for me. I have a big pile of wedding crafts that need done that are so boring that I can't bring myself to do any of them. I have strands of garland that need wire hooks attached to them. I need to cut ribbon and string it through the lanterns. I have pew cones that need hot glued and strings added. I have silk flowers for the pew cones that need about a foot of stem cut off. See, really un-fun stuff. All this stuff is so important to the wedding day decor and it will be worth it when it is done it is just doing it that is the problem.
The worst part of my procrastination is that I feel guilty when I don't do it. Some procrastinators are lucky in that they don't ever feel guilty for not doing the things that they should. Not me, my procrastination comes with a big, heaping pile of guilt. The fact that I am writing this rather than cleaning makes me feel guilty. The fact that yesterday I took a day to myself rather than do wedding crafts makes me feel guilty. It's awful, but in a good way, because eventually the guilt will overwhelm me and I will do the things that need doing. Hopefully, soon enough guilt will pile on my conscience and I will get my boring craftys done.
Anyone else have the procrastination gene? Do you have the double-whammy of procrastination guilt?
Tune in next time for more tales from a DIY bride.
Friday, January 22, 2010
DIY-ing my own Flowers
Or "I am an idjit"
Or "Big Mistake"
Or "Help! I want to scream!"
Anyway, you get the picture. My wedding flowers are hard. Flowers have been something I could care less about from the beginning and yet it has been the biggest nuisance of the wedding. I never dreamed of the flowers at my wedding, groom yes, dress yes, even the cake, but flowers, who cares? Like most things wedding related, I was clueless of the price of flowers. I originally budgeted somewhere around $200 for flowers (for those of you out there laughing at me, don't worry I learned my lesson quick). I quickly learned that even for my rather small wedding party, with flowers that were in season and not too fancy, the very least I could spend was in the ballpark of $400. That's right double my self-allotted budget, whoops. I was shocked to say the least; I mean this is something that's going to die the next day. Seriously? Why would I pay so much for that when I could get something more fun, like an extra 2 hours with the DJ or invite some more guests? I decided that I was D-O-N-E with florists and I would do my own flowers. Yay me for being thrifty and frugal! Boo me for not thinking that one through.
I went back and forth and back and forth and back and forth on what exactly I wanted to do for flowers. Did I want silk or real? What kinds of flowers do I want? Will it go with the wedding vibe? Will it look good? On and on it went. For something I cared so little about it was a big headache. Then I looked into flower alternatives. What are you talking about you ask? I'm talking about having my awesome 'maids carry something else other than flowers. There were parasols (too "Gone with the Wind"), fans (it's only April) and finally clutches! Yahtzee! Bingo! We have a winner! That's right, my girls are carrying clutches down the aisle, pretty clutches with a little corsage type flower on it. Score! Except I still have to design a corsage and figure out how to pin it on the clutch. Boo. I am working on that right now, but I'm not handy with the florals. I may need some guidance from my aunt or uncle, both who work wonders with the florals.
What's that you say? What are you carrying down the aisle, FMT? Ha. Okay you win. I have still got to organize my own bouquet and I'm still playing with ideas. It's been a nightmare really. Why are flowers so freaking hard? I will say that I gave up on live floral about a month ago, it's so pricey and so not worth it to me. I have been playing with silks and real touch flowers in the aisles of Michaels and Hobby Lobby trying to find something that looks like it might be real but isn't. It's a very hard process. Ask Mr. Tal, he has been right there with me; eyes glazed over while I hold endless varieties of flowers clutched together asking his opinion. I probably won't tell you what I decide until after the big day, mostly because it might take until then for me to decide.
Any other girls using the fake floral? What did you use and how did it go?
Tune in next time for more tales from a DIY bride.
Or "Big Mistake"
Or "Help! I want to scream!"
Anyway, you get the picture. My wedding flowers are hard. Flowers have been something I could care less about from the beginning and yet it has been the biggest nuisance of the wedding. I never dreamed of the flowers at my wedding, groom yes, dress yes, even the cake, but flowers, who cares? Like most things wedding related, I was clueless of the price of flowers. I originally budgeted somewhere around $200 for flowers (for those of you out there laughing at me, don't worry I learned my lesson quick). I quickly learned that even for my rather small wedding party, with flowers that were in season and not too fancy, the very least I could spend was in the ballpark of $400. That's right double my self-allotted budget, whoops. I was shocked to say the least; I mean this is something that's going to die the next day. Seriously? Why would I pay so much for that when I could get something more fun, like an extra 2 hours with the DJ or invite some more guests? I decided that I was D-O-N-E with florists and I would do my own flowers. Yay me for being thrifty and frugal! Boo me for not thinking that one through.
I went back and forth and back and forth and back and forth on what exactly I wanted to do for flowers. Did I want silk or real? What kinds of flowers do I want? Will it go with the wedding vibe? Will it look good? On and on it went. For something I cared so little about it was a big headache. Then I looked into flower alternatives. What are you talking about you ask? I'm talking about having my awesome 'maids carry something else other than flowers. There were parasols (too "Gone with the Wind"), fans (it's only April) and finally clutches! Yahtzee! Bingo! We have a winner! That's right, my girls are carrying clutches down the aisle, pretty clutches with a little corsage type flower on it. Score! Except I still have to design a corsage and figure out how to pin it on the clutch. Boo. I am working on that right now, but I'm not handy with the florals. I may need some guidance from my aunt or uncle, both who work wonders with the florals.
What's that you say? What are you carrying down the aisle, FMT? Ha. Okay you win. I have still got to organize my own bouquet and I'm still playing with ideas. It's been a nightmare really. Why are flowers so freaking hard? I will say that I gave up on live floral about a month ago, it's so pricey and so not worth it to me. I have been playing with silks and real touch flowers in the aisles of Michaels and Hobby Lobby trying to find something that looks like it might be real but isn't. It's a very hard process. Ask Mr. Tal, he has been right there with me; eyes glazed over while I hold endless varieties of flowers clutched together asking his opinion. I probably won't tell you what I decide until after the big day, mostly because it might take until then for me to decide.
Any other girls using the fake floral? What did you use and how did it go?
Tune in next time for more tales from a DIY bride.
Wednesday, January 13, 2010
Makeup your mind
Again like many things with the big day, I decided early on to do my own makeup. I do not enjoy people touching my face and the two or so times I've had my makeup done I didn't really like it. I haven't really thought to much about products until recently, figuring I would hit up the local Sephora and see what they said. I ended up going in twice, once just before Christmas and last week. Each time I asked for suggestions, noting that I would need all day coverage and makeup that would look good in pictures. The first time, they were way too busy to give me any helpful information, the second time I got some really good info all written out for me. When I got home I decided to price out everything that was suggested to me and boom, I was hit with over $280 worth of product. That's all well and good and if we weren't on a tight budget I wouldn't have a problem with paying that much for some high quality makeup. As it is we are on a budget, and I can't justify spending that much money on makeup. I've been wavering back and forth for weeks, Mr. Tal, God bless him, isn't helping much because he wants me to have everything I want. So what's a girl to do?
Play with some drugstore makeup of course! I went in and studied some of the products at the drugstore and also did some online research and here is what I think I will end up doing. I will probably use a more expensive primer, foundation, and setting powder. As for the rest of the products, I can use the drugstore products for my blush, eyeshadow, eye liner, lipstick and mascara. I played with it last night and it looked really good, so I think it will work well. As soon as I purchase some of the more expensive products I will post pictures on how the look pulls together.
If anyone has some suggestions on products I would love to hear them.
Tune in next time for more tales from a DIY bride.
Play with some drugstore makeup of course! I went in and studied some of the products at the drugstore and also did some online research and here is what I think I will end up doing. I will probably use a more expensive primer, foundation, and setting powder. As for the rest of the products, I can use the drugstore products for my blush, eyeshadow, eye liner, lipstick and mascara. I played with it last night and it looked really good, so I think it will work well. As soon as I purchase some of the more expensive products I will post pictures on how the look pulls together.
If anyone has some suggestions on products I would love to hear them.
Tune in next time for more tales from a DIY bride.
Tuesday, January 12, 2010
@%#$#%@!!! (Or, Our DIY Invites)
As with many of our wedding decisions, the invites were easy to decide on. Obviously we were on a tight budget, so we figured we would do them ourselves. We did hit up a few bridal show vendors and also one invite store, but nothing just struck us me. I mean I really like pocket folds but with a printer, so not in our budget, at all. I'm also a big fan of simple, which didn't seem to be options in any of the 10-15 invitation books we saw. So like with many things we decided to go the DIY route. Again, that was easy peasy, I walked into Michael's and BAM, we found an invitation kit that was perfect. The BRIDES line at Michael's has some pretty great selections including our own invites:
 (Source)


(Source) Pretty right? Seems pretty simple, the include a website to download the printing templates, so we figured it was an easy job. Right? Right. Wrong. So, so, so, sooooooo freaking wrong. We decided to play with these last week because the invites need to be assembled and sent out soon. In order to save us from screwing up the actual invites, I cut out card stock of the same size. It was a really good idea, because we screwed them up. Well, once we got them to actually print we screwed them up. My printer did not like this project. It took us over 3 hours to figure out how to make the stupid things actually come out of the printer with ink on them. Once we did, everything was off center. It was awful. I wanted to cry. I think I did. I know there was a lot of cursing, from both Mr. Tal and myself. We figured it out eventually and saved, saved, saved everything so that when this week came we could just pop open the templates and print them. Ha. Not so much.
We decided to start assembling last night just to get it out of the way, we were so confident that Mr. Tal suggested I do the invites while he cleaned. Hahaha. Within 5 minutes, I was ready to slam my computer into the wall. Nothing saved, we had to re-calibrate everything. After an hour and a half we figured it out and were on track. But take this as a lesson, once you figure out how to print your invitations, just do it and put them in a box until you are ready to assemble. It will save you a headache and some time. Without further ado, (cue drum roll) here are our invites:

They turned out really great, regardless of what a pain in the butt they were. Would I do my own invites again? In a heartbeat. Even though it was a pain we got to pick exactly what we wanted, at a price that cannot be beat, less than a dollar per invite. I'm really excited (but also kind of sad) to be mailing these puppies out soon. Yikes it's coming up quick.
Anyway, tune in next time for more tales from a DIY bride.
Wednesday, September 30, 2009
MIA
It's been a while, but I've been busy, busy, busy, like a little bee. School is just zipping along, Mr. Tal's birthday was last weekend, plus our official anniversary, and I had a wonderful bridesmaid's luncheon. It's been an amazing few weeks. Oh, and the biggest news of all, my save the dates arrived (!!!) and went out (well at least a few of them, some people *ahem, mamma and poppa* haven't given me addresses).

I love it, it's so us, the back is just our website info, so I'm not posting that up, but it's till pretty rock and roll as far as the font goes. We have had a few issues with people accessing the website, mostly because the font made a few of the "L's" look like back slashes, which is an oopsie on my part. Mr. Tal insists it looks fine and people just don't know how to read websites, but I think he's just trying to make me feel better.
I'll post more on the other events, at least the wedding related ones soon, promise, no more slacking.
Tune in next time for more tales from a DIY Bride.
Without further ado, here are my Save the Dates:
I love it, it's so us, the back is just our website info, so I'm not posting that up, but it's till pretty rock and roll as far as the font goes. We have had a few issues with people accessing the website, mostly because the font made a few of the "L's" look like back slashes, which is an oopsie on my part. Mr. Tal insists it looks fine and people just don't know how to read websites, but I think he's just trying to make me feel better.
I'll post more on the other events, at least the wedding related ones soon, promise, no more slacking.
Tune in next time for more tales from a DIY Bride.
Monday, August 31, 2009
Cone Heads
"You know Connie, I read in a magazine that you can talk to me about anything." Ha-I have to watch that movie now, but I don't think we own it. How sad. Anyway, the real deal with the cones is for our ceremony site. Our beautiful, wonderful opera house needs very little to add to the decor which makes me a happy bride. It does need a little oomph, so in comes another DIY project. Luckily it is ridiculously easy! Yay for easy DIY! These cones will hang at the end of the aisle, alternating every other row.
Mark the wallpaper into 8.5 inches tall by 9 inches long. You may actually want these bigger or smaller, mine a just a tad smaller. Our seats aren't that big, play around with it. One roll of wallpaper goes a long way, trust me.
Cut the wallpaper into as many cones as you'll need. Lay them out and spray paint them. Wait for the pieces to dry.

This is my little pile of cones to be after they have dried.
List of supplies:
Roll of Embossed Wallpaper
Metallic Spray Paint (Gold or Silver)
Hole Punch
Hot Glue Gun
Tape Measure
Scissors
Ribbon/String/Wire
I don't have pictures for the beginning steps, but it is super easy.Roll of Embossed Wallpaper
Metallic Spray Paint (Gold or Silver)
Hole Punch
Hot Glue Gun
Tape Measure
Scissors
Ribbon/String/Wire
Mark the wallpaper into 8.5 inches tall by 9 inches long. You may actually want these bigger or smaller, mine a just a tad smaller. Our seats aren't that big, play around with it. One roll of wallpaper goes a long way, trust me.
This is my little pile of cones to be after they have dried.
Next, heat up your hot glue gun and practice rolling the paper into the cone shape. I had problems with this step, so Mr. Tal rolled and I hot glued the edge to maintain the cone shape. Voila, a cone like the one pictured below:

Then punch a hole at the top center point for your ribbon/wire/string, or in my case raffia. Like so:

Then punch a hole at the top center point for your ribbon/wire/string, or in my case raffia. Like so:
Side note: Another hole towards the bottom of the cone could be helpful to stabilize it when you go to hang it, we're going to need to do this to all our cones because they aren't centered or stable when we hang it. Luckily we only made about two to test, so we don't have to redo all of them.
Easy peasy, you have some cones for your ceremony site. Add whatever flowers you want, I used a giant Gerber daisy from Michael's. It works well, I just needed to add some paper to keep it from sliding around. This is what the cone looks like finished with the flower. Sorry the one picture isn't vertical, we're having technical difficulties in the Tal household.


Tuesday, August 25, 2009
Future Mrs.Tal and the Thousand Paper Luminaries
Way back in the day, in elementary school we had to read a book that had a similar title, Sadako and the Thousand Paper Cranes, I remember it vividly because it was my first encounter with origami. In Asia it is believed that if a person folds a thousand paper cranes they will be granted a wish by a crane. I wonder if a similar legend holds true for paper luminaries? I would love a nice little wish, maybe a new car…oops, lost myself in fantasy (or as I call it if-I-had-money) land for a minute; I’m back now. Anyway, I would love to know if there is any special treat for folding paper luminaries because I’m sure I will have a thousand of ‘um when I finally finish.
I’m making all these luminaries for our centerpieces. Centerpieces that I haven’t really seen beyond the visions I hold in my head. I guess I’m just crossing my fingers and hoping these centerpieces stick and I’m not wasting time and energy on this project.
The luminaries themselves are super easy and to do only 2 or 3 of them takes a just a few minutes, however, I need about 75-100, perhaps more. So each time I’m watching TV I pull out my little luminary making supplies and bust out a few paper luminaries. It slowly adds up and it’s easier on my hands, which I noticed start to ache if I do more than 10 at a time.
What’s that you say? You want a tutorial…so far ahead of you sister friend (or brother man, can’t forget the brothers).
Supplies needed:
· 8.5 x 11 paper (Standard Size Letter) in whichever color your heart desires
· Scissors
· Paper Cutter of some sort
· Standard Hole Punch
· Glue or Double-sided Tape
· 16 mm Circular Hole Punch (Or any shape around that size would probably work)
· Pen/Pencil/Some sort of marking implement

Doing this on a flat surface is helpful; I just used a cutting board while sitting on the floor.
Step 1: Cut paper into 4 inch by 8.5-inch strips, each piece of paper should make 2 luminaries.


Step 2: Fold the strip in half the long way. (Or make a hot dog bun, if you’re familiar with that term)
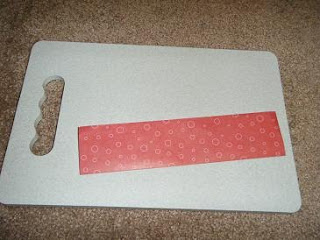
Step 3: Open up the paper, then with your tape measure, make marks every two inches, (1 mark at 2, 4, 6, and 8-inches)

Step 4: Fold the paper at each mark

Step 5: Cut at each of the section folds just to the half fold. Cut away the bottom portion of the small half inch fold.

Step 6: Glue or tap the small half-inch piece to the inside of the first square, so it makes a box-like shape. Then fold all the bottom pieces under and glue or tape the last piece so that you have a box without a top.

Step 8: With the small hole punch, punch two holes opposite of each other, do the same with your larger hole punch.
Voila! Add a tea light (mine is battery operated) use ribbon or craft wire through the small holes to hang your finished product wherever you please!
I’m making all these luminaries for our centerpieces. Centerpieces that I haven’t really seen beyond the visions I hold in my head. I guess I’m just crossing my fingers and hoping these centerpieces stick and I’m not wasting time and energy on this project.
The luminaries themselves are super easy and to do only 2 or 3 of them takes a just a few minutes, however, I need about 75-100, perhaps more. So each time I’m watching TV I pull out my little luminary making supplies and bust out a few paper luminaries. It slowly adds up and it’s easier on my hands, which I noticed start to ache if I do more than 10 at a time.
What’s that you say? You want a tutorial…so far ahead of you sister friend (or brother man, can’t forget the brothers).
Supplies needed:
· 8.5 x 11 paper (Standard Size Letter) in whichever color your heart desires
· Scissors
· Paper Cutter of some sort
· Standard Hole Punch
· Glue or Double-sided Tape
· 16 mm Circular Hole Punch (Or any shape around that size would probably work)
· Pen/Pencil/Some sort of marking implement
Doing this on a flat surface is helpful; I just used a cutting board while sitting on the floor.
Step 1: Cut paper into 4 inch by 8.5-inch strips, each piece of paper should make 2 luminaries.
Step 2: Fold the strip in half the long way. (Or make a hot dog bun, if you’re familiar with that term)
Step 3: Open up the paper, then with your tape measure, make marks every two inches, (1 mark at 2, 4, 6, and 8-inches)
Step 4: Fold the paper at each mark
Step 5: Cut at each of the section folds just to the half fold. Cut away the bottom portion of the small half inch fold.
Step 6: Glue or tap the small half-inch piece to the inside of the first square, so it makes a box-like shape. Then fold all the bottom pieces under and glue or tape the last piece so that you have a box without a top.
Step 8: With the small hole punch, punch two holes opposite of each other, do the same with your larger hole punch.
Voila! Add a tea light (mine is battery operated) use ribbon or craft wire through the small holes to hang your finished product wherever you please!
Subscribe to:
Posts (Atom)